In previous Windows versions, the iSCSI target isn't built-in in Windows Servers. To configure iSCSI target, you need to download and install the on Windows, Windows Server 2008 R2 or using Windows Storage Server.
In Windows Server 2012, the iSCSI target is a feature of Windows Server 2012 and it is easy for us to install and configure.
Goal
Configuring the iSCSI target on Windows Server 2012 GUI.
Lab environment
- 2 Windows Server 2012 servers named MS01 and MS02
- The IP addresses of these servers are 192.168.1.10 and 192.168.1.20
- MS02 will be installed and configure the iSCSI target
Lab
1. On MS02, log in as Administrator.
2. Launch Server Manager, click "Add roles and features".
3. At "Before You Begin" window, click "Next".
4. At "Installation Type", select "Role-based or feature-based installation".

5. Click "Next".
6. At "Server Selection", click "Next".
7. At "Server Roles", expand "File And Storage Services > File and iSCSI Services".
8. Check "iSCSI Target Server".

9. Click "Next" twice.
10. At "Confirmation", click "Install".

11. When installation finished, click "Close".
12. At "Server Manager", click "File and Storage Services".

13. Click "iSCSI".

14. Click "To create an iSCSI virtual disk, start the New iSCSI Virtual Disk Wizard".

15. At "iSCSI Virtual Disk Location", you can select a volume or a custom path to store the VHD.

16. I select volume C: to store the VHD, click "Next".
17. Next to "Name", type "MS01_HD01".

18. Click "Next".
19. Next to "Size", type "10"GB.

20. Click "Next".
21. Select "New iSCSI target".

22. Click "Next".
23. Next to "Name", type "ForMS01".

24. Click "Next".
25. At "Access Servers", click "Add".
26. Select "Enter a value for the selected type" and then select "IP Address".
27. Next to "Value", type "192.168.1.10".

28. Click "OK".

29. Click "Next".
30. At "Enable authentication", leave the default settings, click "Next".
31. At "Confirmation", click "Create".
32. As a result, the virtual disk and iSCSI target have been configured.

33. Click "Close".

Test result
1. On MS01, log in as Administrator.
2. Launch "Server Manager".
3. Click "Tools > iSCSI Initiator".

4. Click "Yes" to start the "iSCSI service".
5. Select "Discovery" tab.

6. Click "Discover Portal".
7. Under "IP address or DNS name", type "192.168.1.20".

8. Click "OK".

9. Select "Targets" tab.
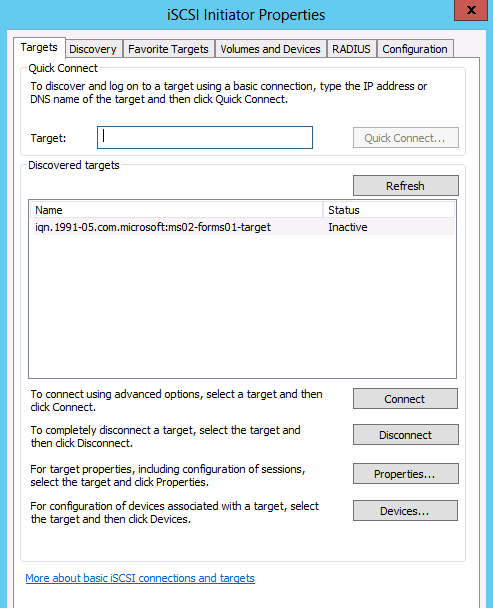
10. Click "Connect".

11. Leave default settings, click "OK".
12. Click "OK" to close "iSCSI Initiator Properties".
13. Back to "Server Manager".
14. Click "File and Storage Services".
15. Click "Disks".

You can see the iSCSI disk has been connected. Now, I can configure the iSCSI disk.
This posting is provided “AS IS” with no warranties, and confers no rights!