Showing posts with label Windows File Share. Show all posts

Sunday, September 21, 2014

Migrating File Servers in the same domain

How to migrate a non-DFS file servers? We will talk about the high level migration steps to migrate Windows File Server Role to a new Windows Server in the same domain.
 
First of all, make sure both file servers were joined to a same domain. Then, administrators can check which folders are sharing by using "Computer Management" or performing "net share" on "Command Prompt".
 
 
Remark: ADMIN$, IPC$, C$ are default share of file servers.
 
After that, administrators can perform "Robocopy" to copy the folder with NTFS permissions from old server to new server or use backup software to back up and restore the folder and file with the same NTFS permissions to a new server.
 
Then, we can export the share permission settings from the registry of the old file server. The registry path of share permission settings is the following:
 
HKEY_LOCAL_MACHINE\SYSTEM\CurrentControlSet\Services\LanmanServer\Shares
 
 
Export "Shares" with "Security" registry key. After exporting the registry key, administrators might need to delete the registry settings which you don't want to import to new file servers.
 
 
Now, we can import the registry file to a new file server. After importing the registry key, we need to reboot the new file server to make share folder permissions effective.
 
When all NTFS and Share permissions are correct, we can stop sharing from the old file servers and then update the drive mapping to a new file server.
 
References:
 
This posting is provided “AS IS” with no warranties, and confers no rights!

Wednesday, August 6, 2014

Configuring an alternate source path for installing roles or features on Windows Server 2012 and R2

In Windows Server 2012 or R2 core fresh installation, the source files aren't copied to the Windows to reduce disk space and some features like .NET Framework 3.5 and Windows Deployment Services (WDS) also aren't copied to Windows. To install .NET Framework 3.5, you can follow "Installing Microsoft .NET Framework 3.5 in Windows Server 2012 or R2 by Windows Server installation disk" to install the feature. However, administrators need to insert the Windows Server installation disk on the server. In domain environment, administrators can copy the sources file to a file share to share it. After that, administrators configure and assign to servers which are installed Windows Server 2012 or R2 core. It's more efficiency.

In addition to core installation, servers with GUI installation were performed "Uninstall-WindowsFeature" with "-Remove" parameter. The binary files for installing roles or features are deleted.

Goal
  • Configuring a file share path on a file server to share source files
  • Configuring default alternate source path for all servers by Group Policy
Lab environment
  • 1 file server is installed Windows Server 2012 R2 named FS02 is joined test.tls1.lab
  • 1 domain controller is installed Windows Server 2012 R2 named DC01
  • 1 server core member server  is installed Windows Server 2012 R2 named SC01
Lab
For the demonstration, I will use Domain Administrator to log in all servers. In production environment, you should use another account with local administrator right to complete the steps.

Configuring folder permission
1. On FS02, log in as Domain Administrator.
2. Create a folder named "Sources" in C drive.


Remark: In production environment, you should configure the share folder on non-system drive.

3. Right-click "Sources", select "Properties".
4. Select "Sharing" tab then click "Advanced Sharing".


5. On "Advanced Sharing" window, check "Share this folder".
6. Click "Permissions".


7. On "Permissions for Sources" window, remove "Everyone" and then add "Domain Computers".
8. Check "Allow - Read".


9. Click "OK" twice.
10. Select "Security" tab then click "Advanced".


11. On "Advanced Security Settings for Sources" window, click "Disable inheritance".


12. On "Block Inheritance" window, click "Convert inherited permissions into explicit permissions on this object".


13. Click "Remove" to remove "Users" on this permission table.


14. Click "Add".
15. On "Permission Entry for Sources" window, click "Select a principal".


16. Enter "Domain Computers".
17. Make sure the permission "Allow - Read, List folder contents and Read & execute" and "Applies to - This folder, subfolders and files".


18. Click "OK".


We assigned the "Allow - Read" permission for Domain Computers to access the "Sources" folder. Domain Users don't need to access this folder.

19. Click "OK" twice.
20. Insert Windows Server installation DVD and then copy "Install.wim" to "C:\Sources".


Remark: In production environment, you may create other subfolders to store the other Windows Versions like Windows Server 2012.

Configuring an alternate source path Group Policy Object
1. On DC01, log in as Domain Administrator.
2. Launch "Group Policy Management Console".
3. Right-click "Default Domain Policy", select "Edit".


4. Navigate to "Computer Configuration > Administrative Templates > System".
5. On the right pane, double-click "Specify settings for optional component installation and component repair".


6. On "Specify settings for optional component installation and component repair" window, select "Enabled".
7. Next to "Alternate source file path", enter "WIM:\\FS02\Sources\install.wim:4".
8. Check "Never attempt to download payload from Windows Update".


We configured to get the source files from the file share and don't allow servers to get sources from Windows Update.

9. Click "OK".
10. Close "Group Policy Management Console".

Testing
Make sure the server is applied the latest GPO.

1. On SC01, log in as Domain Administrator.
2. Launch "PowerShell".
3. Perform "Install-WindowsFeature WDS -IncludeAllSubFeature -IncludeManagementTools" to install Windows Deployment Services on SC01.


As a result, SC01 get the source files from FS02 to install the roles or features.

Additional: Administrators can perform "Get-WindowsFeature | Where InstallState -eq Removed" to check which role or service is needed an alternate source path for installation.


Reference:
Install or Uninstall Roles, Role Services, or Features

This posting is provided “AS IS” with no warranties, and confers no rights!

Saturday, March 22, 2014

Adding and assigning a Windows file share to a Hyper-V host in System Center Virtual Machine Manager 2012 R2

As previous lab, Managing and configuring Windows iSCSI SAN in System Center Virtual Machine Manager 2012 R2, I added the Windows iSCSI SAN in VMM 2012 R2. After that I created a logical unit and then assigned it to a Hyper-V host.

Now, I'd like to add a Windows File Server in VMM 2012 R2 and then assign it to a Hyper-V host.

The file share to store virtual hard disks in a File Server should support SMB 3.0.

Goal
  • Discovering a Windows File Server in System Center Virtual Machine Manager 2012 R2
  • Creating a file share through System Center Virtual Machine Manager 2012 R2
  • Assigning the file share to a Hyper-V host
Prerequisites
Lab environment

I will add a new Windows Server 2012 R2 named SS04 in the existing lab environment.

Computer Name: DC01.test.tls1.lab
Server Roles: Domain Controller and DNS Server
Operating System: Windows Server 2012 R2


Computer Name: VMM1.test.tls1.lab
Server Roles: VMM management server
Operating System: Windows Server 2012 R2

Computer Name: HV02.test.tls1.lab
Server Roles: Hyper-V host
Operating System: Windows Server 2012 R2

Computer Name: SS04.test.tls1.lab
Server Roles: a member server with only 1 drive letter C
Operating System: Windows Server 2012 R2

Lab
Adding a Windows File Server in VMM console
1. On VMM01, log in as VMMAdmin.
2. Launch "Virtual Machine Manager Console".
3. Log in with "Use current Microsoft Windows session identity" option.


4. On "Virtual Machine Manager Console", select "Fabric".


5. On "Fabric" pane, select "Storage".


6. On the menu, click "Add Resources > Storage Devices".


7. On "Select Provider Type" dialog box, select "Windows-based file server".


8. Click "Next".
9. On "Specify Discovery Scope" dialog box, next to "Provider IP address or FQDN", enter "SS04.test.tls1.lab".
10. Next to "Run As account", click "Browse" and then select "VMMAdmin".


11. Click "Next".
12. On "Gather Information" dialog box, click "Next".


13. On "Select Storage Devices" dialog box, click "Next".


14. On "Summary" dialog box, click "Finish".


Creating a file share through VMM console
1. Still in VMM console, on the menu, click "Create File Share".


2. On "Create a file share" dialog box, next to "File server", select "SS04.test.tls1.lab".
3. Next to "Name", enter "DataStore Share 01".
4. Next to "Classification", select "Bronze Tier".
5. Next to "Local path", enter "C:\DataStoreShare01".


6. Click "Create".

Remark: Administrators also can perform PowerShell cmdlets to create a file share.


7. Click "File Servers".


The file share was created successfully.

Assigning the file share to HV02
1. Still in VMM console, select "Servers > All Hosts".


2. Select "hv02", make sure under "Host" tab, click "Properties".


3. On "hv02.test.tls1.lab Properties" dialog box, select "Storage" tab.


4. Click "Add > Add File Share".


5. Next to "File share path", select "\\SS04.test.tls1.lab\DataStore Share 01".


6. Click "OK".
7. Select "hv02", make sure under "Host" tab, click "Properties".
8. On "hv02.test.tls1.lab Properties" dialog box, select "Storage" tab.


As a result, the file share was assigned to HV02.

Test result
1. Still in VMM console, select "VMs and Services".


 2. On the menu, click "Create Virtual Machine".


3. On "Select Source" dialog box, select "Create the new virtual machine with a blank virtual hard disk".


4. Click "Next".
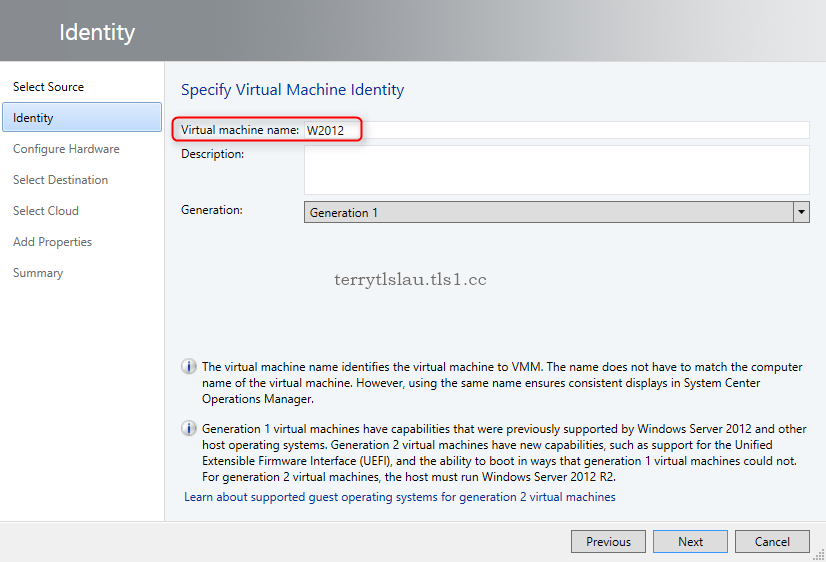
5. On "Identity" dialog box, next to "Virtual machine name", enter "W2012".


6. Click "Next".
7. On "Configure Hardware" dialog box, click "Next".


8. On "Select Destination" dialog box, leave default settings, click "Next".


9. On "Select Host" dialog box, click "Next".


10. On "Configure Settings" dialog box, make sure "Locations" path and "Machine Resources" path are under the file share.


11. Click "Next".
12. On "Select Networks" dialog box, click "Next".


13. On "Add Properties" dialog box, leave default settings, click "Next".


14. On "Summary" window, click "Create".


As a result, the virtual machine configuration file and virtual hard disk are saved in the file share.


More information:


This posting is provided “AS IS” with no warranties, and confers no rights!