Windows Deployment Services and Microsoft Deployment Toolkit aren't the new product, so I don't introduce a lot of them. However, I need to set up them for some testing in my lab environment. I will try to show you the basic steps for installing and configuring WDS and MDT 2012 update 1.
In my lab environment, there are 2 servers named DC01 and MS01 which were installed Windows Server 2008 R2. DC01 is a domain controller with DNS and DHCP services. The domain is named MDTLAB.local. MS01 will be installed WDS and MDT 2012 update 1. In MS01, there are 2 hard drive named C:\ and E:\. E:\ will be used to store the Windows Image and Application for MDT 2012 update 1. The size of E:\ is 100 GB.
Installing WDS server role
1. On MS01, log in as Domain Administrator.
2. Launch "Server Manager".
3. Right-click "Roles", select "Add Roles".


7. On "Roles Services" window, click "Next".

8. On "Confirmation" window, click "Install".
9. On "Results" window, click "Close".

Installing MDT 2012 update 1
Prerequisites
1) Make sure a computer which will be installed MDT 2012 update 1 was installed Microsoft .Net Framework version 3.5 with SP1.
2) Windows PowerShell version 2.0
Assuming that MDT 2012 update 1 was downloaded and saved as C:\Software
1. On MS01, log in as Domain Administrator.
2. Launch "Windows Explorer".
3. Navigate to "C:\Software", double-click the setup file of MDT 2012 update 1.
4. On "Microsoft Deployment Toolkit 2012 Update 1 (6.1.2373.0) Setup" window, click "Next".

5. On "End-User License Agreement" window, check "I accept the terms in the License Agreement".

6. Click "Next".
7. On "Custom Setup" window, click "Next".

8. On "Customer Experience Improvement Program" window, click "Next".

9. On "Ready to install Microsoft Deployment Toolkit 2012 Update 1" window, click "Install".


1. On MS01, log in as Domain Administrator.
2. Launch "Registry Editor".
3. Navigate to "HKEY_LOCAL_MACHINE\SOFTWARE\Microsoft\Deployment 4",
4. Right-click "Deployment 4",select "New > String Value".


In my lab environment, there are 2 servers named DC01 and MS01 which were installed Windows Server 2008 R2. DC01 is a domain controller with DNS and DHCP services. The domain is named MDTLAB.local. MS01 will be installed WDS and MDT 2012 update 1. In MS01, there are 2 hard drive named C:\ and E:\. E:\ will be used to store the Windows Image and Application for MDT 2012 update 1. The size of E:\ is 100 GB.
Installing WDS server role
1. On MS01, log in as Domain Administrator.
2. Launch "Server Manager".
3. Right-click "Roles", select "Add Roles".

4. On "Before You Begin" window, click "Next".
5. On "Server Roles" window, check "Windows Deployment Services".

6. On "WDS" window, click "Next".


9. On "Results" window, click "Close".

Prerequisites
1) Make sure a computer which will be installed MDT 2012 update 1 was installed Microsoft .Net Framework version 3.5 with SP1.
2) Windows PowerShell version 2.0
Assuming that MDT 2012 update 1 was downloaded and saved as C:\Software
1. On MS01, log in as Domain Administrator.
2. Launch "Windows Explorer".
3. Navigate to "C:\Software", double-click the setup file of MDT 2012 update 1.
4. On "Microsoft Deployment Toolkit 2012 Update 1 (6.1.2373.0) Setup" window, click "Next".


7. On "Custom Setup" window, click "Next".


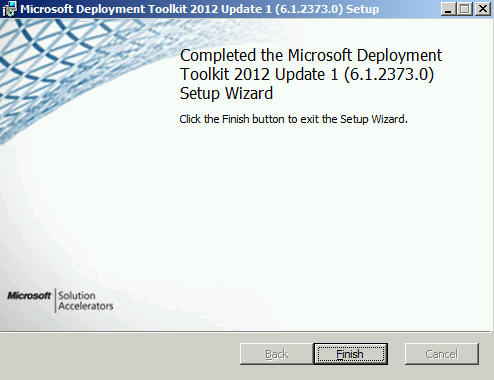
10. On "Completed the Microsoft Deployment Toolkit 2012 Update 1 (6.1.2373.0) Setup Wizard" window, click "Finish".
Change the temp directory for MDT
By default, the Deployment Workbench of MDT uses %Temp% folder to store the media image which is creating. To change the temporary storage location, we can update the registry.
2. Launch "Registry Editor".
3. Navigate to "HKEY_LOCAL_MACHINE\SOFTWARE\Microsoft\Deployment 4",
4. Right-click "Deployment 4",select "New > String Value".

5. Enter "Temp_Dir".

6. Double-click "Temp_Dir".
7. Under "Value data", type "E:\MDT_Temp".

8. Click "OK".
9. Close "Registry Editor".
10. Launch "Windows Explorer".
11. Navigate to "E:\", create a folder named "MDT_Temp".

According to the document of Microsoft Deployment Toolkit, the disk volume that contains the temporary folder that the Deployment Workbench uses has at least 20 GB of available disk space.
Other parts
Installing and Configuring WDS and MDT 2012 Update 1 on Windows Server 2008 R2 Part 4
Installing and Configuring WDS and MDT 2012 Update 1 on Windows Server 2008 R2 Part 5
Installing and Configuring WDS and MDT 2012 Update 1 on Windows Server 2008 R2 Part 6
Installing and Configuring WDS and MDT 2012 Update 1 on Windows Server 2008 R2 Part 5
Installing and Configuring WDS and MDT 2012 Update 1 on Windows Server 2008 R2 Part 6
This posting is provided “AS IS” with no warranties, and confers no rights!
No comments:
Post a Comment