In part 4, I created the driver profile and the task sequence. In this part, I will update the task sequence and create Windows PE images.
Updating the task sequence
I will update the "Inject driver" task and remove "Apply Local GPO Package" in the task sequence.
1. On MS01, log in as Domain Administrator.
2. Launch "Deployment Workbench".
3. Expand "Deployment Share > MDT Deployment Share > Task Sequences".
4. On central pane, right-click "Windows 7 Enterprise x86 deployment", select "Properties".

5. On "Windows 7 Enterprise x86 deployment Properties" window, select "Task Sequence".

6. Expand "Preinstall", select "Inject Drivers".
7. On right pane, next to "Choose a selection profile", select "Hyper-V 2012 x86 Drivers".

8. Expand "State Restore", select "Apply Local GPO Package".
9. Click "Remove".

10. Click "OK".
Remark: There are 4 GPO packs in "E:\DeploymentShare\Templates\GPOPacks" folder.

Creating a boot image
I need to create boot images for MDT deployment.
1. On MS01, log in as Domain Administrator.
2. Launch "Deployment Workbench".
3. Right-click "MDT Deployment Share", select "Properties".

4. Select "Monitoring" tab.
5. Check "Enable monitoring for this deployment share".

This is a new feature in MDT.
6. Select "Windows PE" tab.
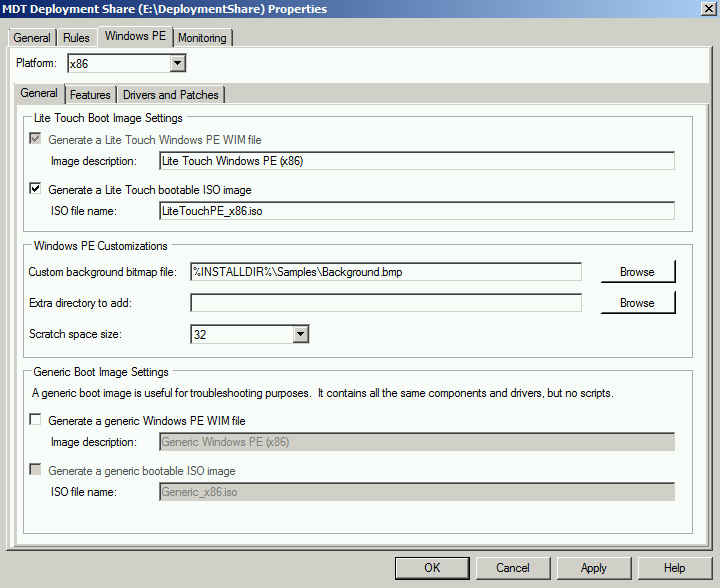
We can change the file name of the boot image and the background image of Windows PE.
7. Select "Drivers and Patches".

We can select the profile for this boot image.

8. Select "Rules" tab.

Rules tab is used to modifying the customsettings.ini and Bootstrap.ini. These files are applied to control Windows PE environment for deployment.
For more information about these files, please read the following web sites.
9. Click "OK".
Remark: After updating the Bootstrap.ini, you have to regenerate the boot images for updating the Bootstrap.ini.
10. Right-click "MDT Deployment Share", select "Update Deployment Share".

11. On "Options" of "Update Deployment Share Wizard" window, select "Completely regenerate the boot images".

12. Click "Next".
13. On "Summary" window, click "Next".

14. On "Confirmation" window, click "Finish".

15. Launch "Windows Explorer", navigate to "E:\DeploymentShare\Boot".

Boot images were created.
Other parts
Installing and Configuring WDS and MDT 2012 Update 1 on Windows Server 2008 R2 Part 4
Installing and Configuring WDS and MDT 2012 Update 1 on Windows Server 2008 R2 Part 6
Installing and Configuring WDS and MDT 2012 Update 1 on Windows Server 2008 R2 Part 6
This posting is provided “AS IS” with no warranties, and confers no rights!
No comments:
Post a Comment