Microsoft announced to work closely with Docket to support container technology on next version of Windows Server, Windows Server 2016, last year. In Windows Server 2016 Technical Preview 3, it started to support one of container technology, Windows Container, in this version. That's why I started to write this post for reference.
As I understand, Windows Container are the lightweight and enhanced virtualization technology. It uses a differencing disk concept to create an isolated environment for each container.
Microsoft provided some documents and steps to set up Windows Server Containers in different environments like Microsoft Azure, existing physical hosts or virtual machines and a virtual machine on a Hyper-V host.
To understand Container easily, I will configure Windows Container host on an existing virtual machine of Windows Server 2016 Technical Preview 3 full installation environment.
Remark: It isn't an official supported environment.
Requirement

1. Launch PowerShell as administrator.
2. Perform wget -uri https://aka.ms/setupcontainers -OutFile C:\ContainerSetup.ps1 to get the PowerShell script to set up an existing virtual machine or physical host to Windows Server Container host.
Remark: This PowerShell script is only for configuring an existing virtual machine or physical host. To configure a new virtual machine to be a Windows Server Container hoston a Hyper-V host, we need to use another script, New-ContainerHost.ps1.
3. Perform C:\ContainerSetup.ps1 to configure Windows Server Container host on the virtual machine.


The Container Base Image is downloading to C:\Windows\System32 folder and it will be extracted to C:\ProgramData\Microsoft\Windows\Images folder.

Eventually, the virtual machine has been configured to be a Windows Server Container host.
After configuration, there are 2 new folders under C:\ProgramData\Microsoft\Windows named Hyper-V and Images.

The Base OS image is under Images and the container will be linked to this and then create a new different disk. I will create a new container later. If you click inside the Images folder, you can find the registry files for Container and the Based OS image.

Navigate to Hyper-V folder, you can find some folders which are related to Containers.

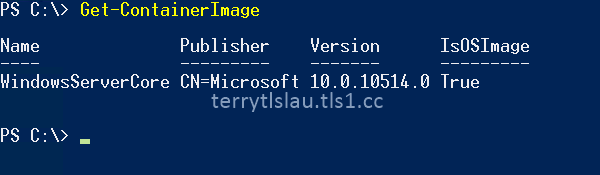
4. A Windows Container is based on the Base OS image, perform Get-ContainerImage to get the name of the Base OS image.

5. Perform $Con = New-Container -Name Container01 -ContainerImageName WindowsServerCore -SwitchName "Virtual Switch" to create a new container named "Container01".

Navigate to C:\ProgramData\Microsoft\Windows\Hyper-V\Containers folder. There are some virtual machine files for the container, Container01.

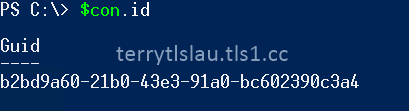
We can perform $con.id on PowerShell console to verify the ID of this container.

6. Perform Start-Container -Name Container01 to start the Windows Container and then perform Get-Container to verify it.

7. To manage and install program on this container, we can perform Enter-PSSession -ContainerId $con.id -RunAsAdministrator.

Now, you can perform PowerShell cmdlet to manage this container or install program on this container.
In this part, we understand the basic concept and operation of Windows Container.
As I understand, Windows Container are the lightweight and enhanced virtualization technology. It uses a differencing disk concept to create an isolated environment for each container.
Microsoft provided some documents and steps to set up Windows Server Containers in different environments like Microsoft Azure, existing physical hosts or virtual machines and a virtual machine on a Hyper-V host.
To understand Container easily, I will configure Windows Container host on an existing virtual machine of Windows Server 2016 Technical Preview 3 full installation environment.
Remark: It isn't an official supported environment.
Requirement
- Windows Server 2016 Technical Preview 3 full installation
- Make sure the virtual machine connects to Internet
Before configuring Windows Container, there are no Hyper-V folder and Images folder under C:\ProgramData\Microsoft\Windows path.

2. Perform wget -uri https://aka.ms/setupcontainers -OutFile C:\ContainerSetup.ps1 to get the PowerShell script to set up an existing virtual machine or physical host to Windows Server Container host.
Remark: This PowerShell script is only for configuring an existing virtual machine or physical host. To configure a new virtual machine to be a Windows Server Container hoston a Hyper-V host, we need to use another script, New-ContainerHost.ps1.
3. Perform C:\ContainerSetup.ps1 to configure Windows Server Container host on the virtual machine.


After configuration, there are 2 new folders under C:\ProgramData\Microsoft\Windows named Hyper-V and Images.


In this part, we understand the basic concept and operation of Windows Container.
This posting is provided “AS IS” with no warranties, and confers no rights!
No comments:
Post a Comment