VMM library server is a file share to share resources such as, virtual hard disks, ISO images, PowerShell scripts and so on for virtual machines hosts which are managed by System Center Virtual Machine Manager Management Server. By default, when administrators install a System Center Virtual Machine Manager management server in a server, the wizard also configures a library server in the same server except high availability VMM management server. Installing high availability management servers, administrators cannot configure a library server at that time. Administrators need to add a new one for the high availability management servers.
Administrators can add more than one library server into System Center Virtual Machine Manager. They can also assign a library server for a specific host group in Virtual Machine Manager. It can improve the performance because some Hyper-V servers are located to different cluster, location and Data Center.
Goal
- Add an additional library server in System Center Virtual Machine Manager (SCVMM) 2012 R2
Lab environment
- 1 System Center Virtual Machine Manager (SCVMM) 2012 R2 named VMM01 which is installed Windows Server 2012 R2
- 1 File server named LS01 which is installed Windows Server 2012 R2
For more information to install System Center Virtual Machine Manager (SCVMM) 2012 R2:
Lab
Configuring the share folder to be a library server
According to Microsoft, the minimum required permissions of a library server are that the Local System (SYSTEM) account has full control permissions at both the share and the NTFS file system level.
However, to add resources to a library share, an administrator typically needs to access the share through Windows Explorer. The can do this either outside VMM or through the VMM console, where they can right-click the library share, and the click Explore. Because of this, make sure that you assign the appropriate access control permissions outside VMM. For example, we recommend that you assign full control share and NTFS permissions to the Administrators group.
Quote from "How to Add a VMM Library Server or VMM Library Share"
We will check the existing share and NTFS permission in default library server.
1. On VMM01, log in as VMMAdmin.
2. Launch "Windows Explorer", navigate to "C:\ProgramData".
3. Right-click "Virtual Machine Manager Library Files", select "Properties".

This is the default path of the first library server.
4. On "Virtual Machine Manager Library Files Properties" window, select "Sharing" tab.
5. Click "Advanced Sharing".

6. On "Advanced Sharing" window, click "Permissions".

7. On "Permissions for MSSCVMMLibrary" window, we can check the share permissions.

By default, there are the following accounts with "Allow - Full Control".
SYSTEM
VMM01$ [Computer account of VMM management server]
SCVMM Admins
VMMSvc
Domain Admins
Administrators
All accounts are the member of "Local Administrators" group except the computer account.
8. Click "Cancel" twice.
9. On "Virtual Machine Manager Library Files Properties" window, select "Security" tab.
10. Click "Advanced".


The accounts are same as the share permission one. They also are assigned "Allow - Full control" and "Applies to - This folder, subfolders and files".
11. Click "Cancel".
12. Click "Close" to close "Virtual Machine Manager Library Files Properties" window.
13. Go to "LS01", log in as Domain Administrator.
14. Launch "Windows Explorer" and then navigate to "C:\".
15. Create a new folder named "VMM Library".

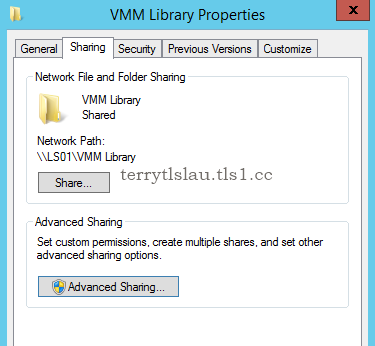
16. Right-click "VMM Library", select "Properties".
17. On "VMM Library Preperties" window, select "Sharing" tab.
18. Click "Advanced Sharing".

19. On "Advanced Sharing" window, check "Share this folder".

20. Click "Permissions".
21. On "Permissions for VMM Library" window, add "SCVMM Admins" and "SYSTEM".
21. Assign "Allow - Full Control" for both accounts.

22. Click "OK" twice.
23. On "VMM Library Properties" window, select "Security" tab.
24. Click "Advanced".

25. On "Advanced Security Settings for VMM Library" window, click "Disable Inheritance".

26. On "Block Inheritance" window, click "Remove all inherited permissions from this object".

27. On "Advanced Security Settings for VMM Library" window, click "Add".
28. On "Permission Entry for VMM Library" window, click "Select a principal".

29. Enter "SCVMM Admins" and then click "OK".
30. On "Permission Entry for VMM Library" window, check "Full control".

31. Click "OK".
32. Repeat step 27 - 31 to add "SYSTEM".

33. Click "OK".
34. Click "Close" to close "VMM Library Properties" window.
35. Launch "Computer Management".
36. Expand "System Tools > Local Users and Groups > Groups".
37. Double-click "Administrators".

38. Add "SCVMM Admins" group into "Administrators" group.

Add "SCVMM Admins" group into "Administrators" group for DCOM permission.
39. Click "OK".
Adding an additional Library Server into VMM management server
1. On VMM01, log in as VMMAdmin.
2. Launch "Virtual Machine Manager Console".
3. Log in as "Use current Microsoft Windows session identity".

4. Click "Connect".
5. On "Virtual Machine Manager Console", select "Library".
6. On the "Home" menu, click "Add Library Server".

7. On "Enter Credentials" window, select "Enter a user name and password".
8. Enter "TLS1Test\VMMAdmin" and the password of "TLS1Test\VMMAdmin".

9. Click "Next".
10. On "Select Library Servers" window, next to "Computer name", enter "LS01".
11. Click "Add".


12. Click "Next".
13. On "Add Library Shares" window, check "VMM Library".

14. Click "Next".
15. On "Summary" window, click "Add Library Servers".


As a result, an additional Library Server has been added into the VMM management server.
To assign an additional Library Server to a host group,right-click "ls01.test.tls1.lab", select "Properties".

Next to "Host group" to assign it.

To optimize a library server, please read the following web site for your information:
More information:
This posting is provided “AS IS” with no warranties, and confers no rights!
No comments:
Post a Comment