Showing posts with label Failover Clustering. Show all posts

Wednesday, January 27, 2016

Shut down and bring up Windows Cluster properly on Windows Server 2012 R2

Today, I'd like to share two blog posts from Microsoft Cluster and High-Availability. These blog posts talked how to properly shutdown and bring up cluster and cluster node in Windows Server 2012 R2. If you aren't familiar with failover cluster in Windows Server 2012 R2, please go to check it.

How to Properly Shutdown a Failover Cluster or a Node
This posting is provided “AS IS” with no warranties, and confers no rights!

Recommended hotfixes for Windows Server 2012 R2 Hyper-V from Microsoft KBs

Microsoft listed the recommended hotfixes for Windows Server 2012 R2 Hyper-V environment on some KBs. These hotfixes are related to Hyper-V, Failover Clustering and Hyper-V Network Virtualization on Windows Server 2012 R2. These hotfixes aren't downloaded from Windows Update of Windows Server 2012 R2. Administrators have to request and download it manually. However, some hotfixes may not be suitable for your Hyper-V hosts because some features that you don't implement. Please go to the following web sites to check what you need and then apply it to your Hyper-V hosts. And, these hotfixes are updated irregularly.

Recommended hotfixes, updates, and known solutions for Windows Server 2012 R2 Hyper-V environments

Recommended hotfixed and updates for Windows Server 2012 R2-based failover clusters

Recommended hotfixes, updates, and known solutions for Windows Server 2012 R2 Hyper-V Network Virtualization (HNV) environments

This posting is provided “AS IS” with no warranties, and confers no rights!

Monday, December 7, 2015

Migrate Windows Server 2012 R2 Hyper-V cluster to another domain

Recently, I did a migration task to migrate a Windows Server 2012 R2 Hyper-V cluster with Cluster Shared Volume to another domain. To migrate Hyper-V Cluster with Virtual Machines, it took some down time for the virtual machines during the migration. By the way, I would like to make high level steps what I did in this migration for reference.

Current Hyper-V cluster environment
  • 2 nodes Windows Server 2012 R2 Hyper-V Cluster with Cluster Shared Volumes from A domain
  • Some virtual machines are under this Hyper-V Cluster
Goal
  • Migrate these 2 nodes Hyper-V Cluster to B domain
  • Keep the same computer names of the Hyper-V Hosts

High level steps
  • Take screen captures of the folder structures under CSVs
  • Create a temp local administrator accounts on Hyper-V hosts (optional)
  • Perform live migration to move all VMs to the second Hyper-V host in the current Hyper-V cluster
  • Move all CSVs to the second Hyper-V host in the current Hyper-V cluster
  • Move the cluster core resources to other Hyper-V hosts which are in the same clusters
At the current state, all cluster related resources were moved to the second host
  • Evict a node which is no cluster resource from the existing Hyper-V Cluster
  • Clear the cluster configuration on the evicted node by performing Clear-ClusterNode -Name <evicted node name> -Force
  • Remove the Failover Cluster role on the evicted node and then restart the computer
  • Update the IP addresses of all NICs on the evicted node and then join B domain
  • Install Failover Cluster Role and then create a new cluster
  • Shut down all VMs on the Hyper-V Cluster of A domain
  • Remove all VMs from Failover Cluster Manager
  • Take all CSVs offline
  • Remove all CSVs from Hyper-V Cluster of A domain
  • Destroy the Hyper-V Cluster of A domain
  • Clear the cluster configuration on the last node of Hyper-V cluster by performing Clear-ClusterNode -Name <evicted node name> -Force
After removing the Hyper-V Cluster of A domain, the VM configurations still keep in the last Hyper-V host with "Off-Critical" state.

  • Remove the Failover Cluster role on the last node and then restart the computer
  • Bring quorum disk online and then format it as NTFS format on the Hyper-V host of B domain
  • Add the quorum disk and the change the quorum setting to Node and Disk witness on the Hyper-V Cluster of B domain
  • Add other disks on the Hyper-V Cluster of B domain

At the lower pane, you can find the name of the cluster disks.

  • Convert the disks in the same sequence of previous Hyper-V Cluster to CSV.
  • Update the IP addresses of all NICs on the last node and then join B domain
  • Install Failover Cluster Role and then on the second nodes to the new Hyper-V Cluster
  • Click "Configure Role" to convert all VMs to high availability in the new Hyper-V Cluster

  • Perform cluster validation test before bring all VMs online
  • Update the delegation Kerberos settings on Active Directory of B domain for live migration
  • Perform some Failover test on the Hyper-V Cluster of B domain
Additional information:
You might find the warning message on the new cluster because the local cluster account, CLIUSR, wasn't deleted during remove the server role. To solve this issue, you can delete the CLIUSR user account manually. Then, restart the Hyper-V host.

Other reference for Hyper-V cluster migration:
This posting is provided “AS IS” with no warranties, and confers no rights!

Monday, October 26, 2015

Check an unique ID of LUN by PowerShell

Each LUN has a Unique ID so we can perform Get-Disk | Select UniqueId on PowerShell to check this ID.


Based on the Unique ID, we can perform Get-Disk | Where UniqueId -eq <UniqueId> | Get-Partition | Select AccessPaths to check this LUN mapped to which CSV.


This posting is provided “AS IS” with no warranties, and confers no rights!

Tuesday, October 13, 2015

Convert an existing virtual machine to a high availability virtual machine on Failover Cluster Manager

After configuring a Hyper-V cluster on Windows Server 2012 or Windows Server 2012 R2, we should use Failover Cluster Manager to create a high availability virtual machine. If we use Hyper-V Manager of one of cluster nodes, a virtual machine doesn't appear on Failover Cluster Manager because the virtual machine isn't high availability. 


Before converting an existing machine, make sure it stored on a shared path of the cluster.

1. To convert an existing virtual machine to a high availability virtual machine, Right-click Roles > Configure Role on Failover Cluster Manager.


2. On "Select Role" window, select Virtual Machine and then click Next.


3. In "Select Virtual Machine" window, check the virtual machine name and then click Next.


4. On "Confirmation" window, click Next.


5. On "Summary" window, click Finish.


As a result, the virtual machine has been converted to a high availability virtual machine within the cluster.


We can perform Get-VM <VMName> | Add-ClusterVirtualMachineRole to complete the above task in a same cluster node.


This posting is provided “AS IS” with no warranties, and confers no rights!

Sunday, May 17, 2015

Top Support Solutions for Windows Server 2012 and Windows Server 2012 R2 by TechNet Blogs post

I'd like to share one of useful TechNet blogs posts, Top Support Solutions for Windows Server 2012 and Windows Server 2012 R2. This post shared a lot of web sites for troubleshooting the following Windows Features, DirectAccess, Active Directory related, unexpected errors and restarts, Remote Desktop Services, Windows updates related, Failover Clustering, DNS and Access to file shares (SMB). 

We may find some hints from the web sites for troubleshooting the above Windows Features. Don't forget to bookmark this web site.

This posting is provided “AS IS” with no warranties, and confers no rights!

Sunday, February 15, 2015

Configuring Cloud Witness on Windows Server 2016 (Technical Preview version)

In Windows Server Technical Preview (vNext), there is a new Failover Cluster quorum option, Cloud Witness. Administrators can configure a cluster to save a quorum to Microsoft Azure. Cloud Witness can apply to many scenarios like Exchange DAG, Multi-Site Cluster and so on. To use cloud witness, there are some requirements.
  • Microsoft Azure Account (We need to create a Azure Storage Account under the Microsoft Azure Account)
  • Windows Server Technical Preview (This is a new option for Windows Server Technical Preview)
  • Make sure the cluster can access Internet (The cloud witness is saved at Microsoft Azure, cluster nodes must connect to Internet)

Lab environment
  • Microsoft Azure account
  • 1 domain controller is installed Windows Server Technical Preview named DC01
  • 4 member servers are installed Windows Server Technical Preview named Node01 to Node 04 and joined tlslab.local domain
  • 2 cluster were created and named "Cluster01" and "Cluster02"
  • All settings will be performed by Domain Administrator


Goals
Configure Cloud Witness for Cluster01 and Cluster02 by Failover Cluster Manager and Powershell

Steps
1. Log in your Microsoft Azure account on www.azure.com.
2. On Azure Portal, select "Storage".
3. Select your storage account on Microsoft Azure, click "Manage Access Keys".


4. On "Manage Access Keys", copy "STORAGE ACCOUNT NAME" and "PRIMARY ACCESS KEY" by clicking the icon and then paste it to notepad.


5. Click "Tick" icon.

Now, we got the "STORAGE ACCOUNT NAME" and "PRIMARY ACCESS KEY" to access the Azure Storage Account. We can configure the Cloud Witness on "Cluster01" and "Cluster02".

6. On Node01, log in as Domain Administrator.
7. Launch "Failover Cluster Manager".
8. Right-click "Cluster01", select "More Actions > Configure Cluster Quorum Settings".


9. On "Before You Begin" window, click "Next".
10. On "Select Quorum Configuration Option" window, select "Select the quorum witness".


11. Click "Next".
12. On "Select Quorum Witness" window, select "Configure a cloud witness".


13. Click "Next".
14. On "Configure cloud witness" window, next to "Azure storage account name", paste "STORAGE ACCOUNT NAME" of your Azure account from notepad.
15. Next to "Azure storage account key", paste "PRIMARY ACCESS KEY" of your Azure account from notepad.


16. Click "Next".
17. On "Confirmation" window, click "Next".


18. On "Summary" window, click "Finish".


The Cloud Witness has been configured on "Cluster01".


After configuring Cloud Witness, your Azure Storage Account also created "msft-cloud-witness".

19. On Node03, log in as Domain Administrator.
20. Launch "PowerShell" as administrator.
21. Perform Set-ClusterQuorum -Cluster Cluster02 -CloudWitness -AccountName <Azure Storage Account Name> -AccessKey <PRIMARY ACCESS KEY of your Azure account> to configure Cloud Witness for Cluster02.


After configuring Cloud Witness on both clusters, there are 2 records in containers of msft-cloud-witness.

Remark: If you regenerate the "Manage Access Keys" on the Azure Storage Account after configuring Cloud Witness. Make sure you apply a new key on Clusters which are applied the previous key. If the new key isn't applied to Clusters, The status of Cloud Witness changes to "Failed" and you get the event ID 1659 on Cluster Events.


This posting is provided “AS IS” with no warranties, and confers no rights!

Wednesday, February 4, 2015

Learn Windows Server 2012 R2 Failover Clustering from a Microsoft Virtual Academy (MVA) course

There is a new recorded Microsoft Virtual Academy (MVA) course is talked about Windows Server 2012 R2 Failover Clustering. The course is hosted by Symon Perriman, 5 nine software Vice President of Business Development, and Elden Christensen, Microsoft Principal Program Manager Lead. This course was given an introduction of Failover Clustering and talk Cluster deployment, networking, storage and so on. Let's watch this MVA to learn some best practices.


This posting is provided “AS IS” with no warranties, and confers no rights!

Thursday, November 20, 2014

What's new features of Failover Clustering on Windows Server Technical Preview (vNext)

Are you looking for information of failover clustering on Windows Server Technical Preview (vNext)?

On Edge Show 125 - Failover Clustering in the next version of Windows Server, Symon Perriman, Senior Technical Evangelist, and Elden Christensen, Principal Program Manager Lead for Failover Clustering, talked about what's new features of Failover Clustering on next version of Windows Server.

Cloud Witness
Recently, there's a blog post to talk about Cloud Witness which is a new feature on next version of Windows Server on Clustering and High-Availability blog. Next version of Windows Server supports to create a quorum witness to store on Microsoft Azure. To use Cloud Witness, we need a Microsoft Azure Storage Account. On "Introducing Cloud Witness", it provided the steps to configure Cloud Witness on Windows Server Technical Preview.

Cluster Operating System (OS) Rolling Upgrade for Hyper-V and Scale-Out File Server
Cluster Operating System Rolling Upgrade is a new feature on Windows Server Technical Preview. Administrators can configure mixed cluster environment when performing upgrade Hyper-V and Scale-Out File Server cluster.

Cluster OS Rolling Upgrade provides the following benefits:

  • Hyper-V virtual machine and Scale-out File Server workloads can be upgraded from Windows Server 2012 R2 to Windows Server Technical Preview without downtime. Other Cluster workloads will be unavailable during the time it takes to failover to Windows Server Technical Preview.
  • It does not require any additional hardware.
  • The cluster does not need to be stopped or restarted.
  • A new cluster is not required. In addition, existing cluster objects stored in Active Directory are used.
  • The upgrade process is reversible until the customer crosses the "point-of-no-return", when all cluster nodes are running Windows Server Technical Preview, and when the Update-ClusterFunctionalLevel PowerShell cmdlet is run.
  • The cluster can support patching and maintenance operations while running in the mixed-OS mode.
  • It supports automation via PowerShell and WMI.
  • The ClusterFunctionalLevel property indicates the state of the cluster on Windows Server Technical Preview cluster nodes.

Basically, administrators need to use the Failover Cluster Manager of Windows Server Technical Preview to configure the cluster upgrade.

In the session, Advantages of Upgrading Your Private Cloud Infrastructure in the Next Release of Windows Server, of TechEd Europe 2014, Taylor Brown and Rob Hindman gave demonstration to upgrade Hyper-V and Scale-Out File Server cluster from Windows Server 2012 R2 to Windows Server Technical Preview.

I hope the above information can help you understand new features of Failover Clustering on Windows Server Technical Preview.

This posting is provided “AS IS” with no warranties, and confers no rights!

Monday, February 24, 2014

Cluster-Aware Updating in Windows Server 2012 and R2

Starting from Windows Server 2012, Microsoft added a feature in Failover Cluster, Cluster-Aware Updating (CAU). Cluster-Aware Updating (CAU) is a feature for applying Windows updates to a cluster that includes all nodes. Cluster-Aware Updating (CAU) can also import a plug-in and then install drivers or firmware to a cluster. 

Cluster-Aware Updating (CAU) will instruct clusters to the following steps to apply updates.
  • All cluster nodes download updates from the source
  • Put one of cluster nodes to maintenance mode
  • Move all related cluster roles from the cluster nodes which will install updates to other cluster nodes
  • Install updates to the cluster node which is in maintenance mode
  • After installing the update, the server may need to restart
  • After restart, the cluster node join the cluster and exit maintenance mode
  • Repeat the above steps for other cluster nodes

Cluster-Aware Updating (CAU) apply updates to one of cluster nodes each. Cluster-Aware Updating (CAU) is a cluster scope based feature. You cannot apply updates to a specific nodes by Cluster-Aware Updating (CAU).

There are 2 modes of Cluster-Aware Updating (CAU) which are "Self-updating mode" and "Remote-updating mode". "Self-updating mode" is a mode for clusters to configure the update schedule and then follow the schedule to install updates by themselves. "Remote-updating mode" is a mode to control the clusters to apply updates from a remote computer. Before using both modes of Cluster-Aware Updating (CAU), administrators need to configure the following prerequisites

Enable Windows Management Instrumentation
By default, all Windows Servers have been enabled Windows Management Instrumentation (WMI) in Windows Server 2012 or Windows Server 2012 R2.


If not, click to enable it on Server Manager.


Or perform "Set-WsManQuickConfig" as administrator in a PowerShell console to enable it.


Enable Windows PowerShell and Windows PowerShell remoting
By default, all Windows Servers have been enabled PowerShell remoting in Windows Server 2012 or Windows Server 2012 R2.

If not, perform "Enable-PSRemotingas administrator in a PowerShell console to enable it.


Install .NET Framework 4.5
By default, all Windows Server 2012 or Windows Server 2012 R2 have been installed Microsoft .NET Framework 4.5.

If not, launch "Server Manager > Add Roles and Features" to install Microsoft .NET Framework 4.5


Or perform "Install-WindowsFeature NET-Framework-45-Core, NET-WCF-TCP-PortSharing45" as administrator to install the feature.


Enable a firewall rule to allow automatic restarts
We need to configure the Windows Firewall rules in cluster nodes to allow the inbound TCP protocol to remote shutdown. To update the firewall rules, we can apply it by "Group Policy" or update it from GUI or PowerShell on each node.

GUI
1. Launch "Windows Firewall with Advanced Security" in a cluster node.
2. Right-click "Inbound Rules > New Rule".


3. On "Rule Type" window, select "Predefined > Remote Shutdown".


4. Click "Next".
5. On "Predefined Rules" window, check all rules.


6. Click "Next".
7. On "Action" window, select "Allow the connection".


8. Click "Finish".
9. Right-click "Inbound Rule for Remote Shutdown (RPC-EP-In)", select "Properties".


10. Select "Advanced" tab.
11. Next to "Profiles", check "Domain" only.


12. Click "OK".
13. Repeat step 9 -12 for "Inbound Rule for Remote Shutdown (TCP-In)".

PowerShell
Launch "PowerShell" as administrator and then perform "Set-NetFirewallRule -Group "@firewallapi.dll,-36751" -Profile Domain -Enabled True -PassThru" to enable the firewall rule in a cluster node.


Remark: You will discover the following error If "Inbound Rule for Remote Shutdown (RPC-EP-In)" and "Inbound Rule for Remote Shutdown (TCP-In)" are deleted.


Administrators need to perform "New-NetFirewallRule -DisplayName "Inbound Rule for Remote Shutdown (RPC-EP-In)" -Group "@firewallapi.dll,-36751" -Profile Domain" and "New-NetFirewallRule -DisplayName "Inbound Rule for Remote Shutdown (TCP-In)" -Group "@firewallapi.dll,-36751" -Profile Domain" to create and enable the firewall rules.


Change the "Windows Update settings" to "Never check for updates"
Microsoft suggested that the "Windows Update settings" should be changed to "Never check for updated (not recommended)" in all cluster nodes which will be used Cluster-Aware Updating (CAU) because there is a own update schedule for Cluster-Aware Updating (CAU) itself.


Make sure all cluster nodes download updates from the same update source like a WSUS server.

If you use Group Policy to apply the "Windows Update settings", you should select "2 - Notify for download and notify for install".


Goal 
  • Testing "Self-updating mode" in a cluster named CU01
  • Testing "Remote-updating mode" in a cluster named CU01
Lab environment
  • All servers are installed Windows Server 2012 R2 Datacenter version
  • DC01 is a domain controller of test.tls1.lab
  • All cluster nodes have been joined test.tls1.lab
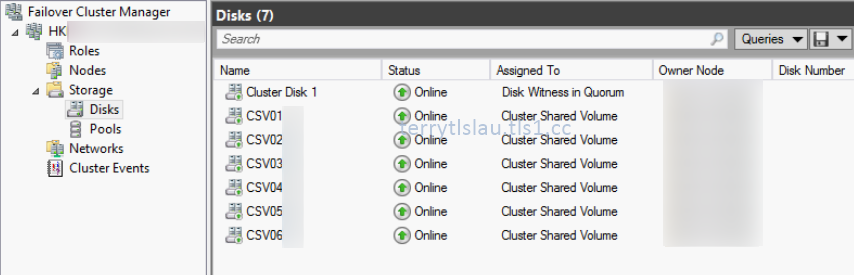
  • There are 7 cluster nodes with node majority quorum joined a cluster, CU01
  • The cluster nodes named, CS01, CS02, CS03, CS05, CS06, CS07, CS08

  • Windows Server Update Services is installed in a server named CS04
  • All cluster nodes pointed to CS04 to download updates (Optional)
Lab
To simplify the steps, I will use domain administrator to complete the lab.

Testing "Self-updating mode"
1. On CS01, log in as Domain Administrator.
2. Launch "Cluster-Aware Updating".
3. On "Cluster-Aware Updating" window, next to "Connect to a failover cluster", enter "CU01" and then click "Connect".


All cluster nodes haven't been updated.

4. Click "Analyze cluster updating readiness".


There are 2 warning in this readiness result. The first one is about machine proxy setting. If the cluster is in a branch office, you may need to configure the proxy settings on cluster nodes. We can ignore it at this moment. The second one is if we use "Self-updating mode", we need to configure CAU clustered role in this cluster. We will configure CAU clustered role.

Remark: We can also perform "Test-CauSetup" on PowerShell console to run the readiness check.


5. Click "Close".
6. Click "Configure cluster self-updating options"


7. On "Getting Started" window, click "Next".


8. On "Add CAU Clustered Role with Self-Updating Enabled" window, check "Add the CAU clustered role, with self-updating mode enabled, to this cluster".
9. Check "I have a prestaged computer object for the CAU clustered role" and then enter "CAU01".


If the cluster is under default container like "Computer", we don't need to prestage a virtual computer object for the CAU clustered role. If not, please create a computer object in Active Directory Users and Computers and then grant "Allow - full control" for "CU01".


After that, disable "CAU01".


10. Click "Next".
11. On "self-updating schedule" window, leave default settings.


We can configure the schedule for this cluster so we don't need to follow the WSUS update schedule.

12. Click "Next".
13. On "Advanced Options" window, there are some options we need to be aware.


StopAfter: Time in minutes after which the Updating Run will be stopped if it has not completed. By default, it is "Unlimited time".

MaxFailedNodes: After applying update to a cluster node, the cluster node may not boot up. We need to determine how many nodes are able to fail in this cluster.

RequireAllNodesOnline: By default, this value isn't checked.

RebootTimeoutMinutes: By default, this value is 15 mins. We may change it for a physical node.

In "Advanced Options", we can also assign pre update script for before installing update and post update script for after installing to a cluster.

14. Leave default settings, click "Next".
15. On "Additional Options" window, check "Give me recommended updates the same way that I receive important updates".


16. Click "Next".
17. On "Confirmation" window, click "Apply".


18. On "Completion" window, click "Close".

Now, the cluster, CU01, follow the schedule to download and install update to all nodes. However, we can apply it immediately by clicking "Apply updates to this cluster".

Now, I will check the current updates for all cluster nodes.

19. Click "Preview updates for this cluster".


20. On "Preview Updates" window, click "Generate Update Preview List".


The current plug-in, "Microsoft.WidnowsUpdatePlugin", is used to connecting Windows Update servers or a Windows Server Update Services (WSUS) server. To install standalone update, we need to additional settings and select "Microsoft.HotfixPlugin".


To install firmware and drivers, we need to import a plug-in from vendors.

There are 3 updates available for all cluster nodes.


Remark: We cannot select or un-select the Windows updates from this window to apply to cluster nodes. To control the Windows updates, Administrators can control it from WSUS server or from "Windows Update" panel.


21. Click "Close".
22. Click "Apply updates to this cluster".


23. On "Getting Started" window, click "Next".


24. On "Confirmation" window, click "Update".


25. On "Completion" window, click "Close".

All cluster nodes are downloading updates from the same source, CS04.


One of cluster nodes, CS05, changed to maintenance mode and started to install the Windows updates.


After installing Windows updates finished, CS05 restart automatically.


When the server boot up successfully, it left maintenance mode.


Make sure Windows updates have been succeeded to apply to a cluster node, Cluster-Aware Updating (CAU) instructs another cluster node to change to maintenance mode and then install Windows update.


As a result, all cluster nodes have been installed Windows updates.


26. Click "Generate report on past Updating Runs".


27. On "CU01 - Generate Updating Run Report" window, click "Generate Report".


We can see which update and installation date of Windows updates were applied.

Testing "Remote-updating mode"
Administrators can install "Failover Cluster Management Tools" and "Failover Cluster Module for Windows PowerShell" features on Windows 8, Windows 8.1, Windows Server 2012 or Windows Server 2012 R2 to manage Cluster-Aware Updating (CAU).


1. To use "Remote-updating mode", launch "Cluster-Aware Updating" on a remote computer as Domain Administrator.
2. Connect to the cluster.


3. Then we can click "Apply updates to this cluster" without configuring "CAU clustered role".
4. On "Getting Started" window, click "Next".


5. On "Advanced Options" window, leave default settings, click "Next".


6. On "Additional Options" window, leave default setting, click "Next".


7. On "Confirmation" window, click "Update".


8. On "Completion" window, click "close".

As a result, Cluster-Aware Updating (CAU) is running in "Remote-updating mode" and work fine.


Remark: We can perform "Invoke-CauRun" to request a cluster to download and install the update.

More information:


This posting is provided “AS IS” with no warranties, and confers no rights!