Showing posts with label Microsoft Deployment Toolkit (MDT). Show all posts

Tuesday, August 18, 2015

Microsoft Desktop Optimization Pack (MDOP) 2015 and Microsoft Deployment Toolkit (MDT) 2013 update 1 are ready for Windows 10

Windows 10 was released on 29-Jul-2015. Microsoft released a new version of Microsoft Desktop Optimization Pack (MDOP) and Microsoft Deployment Toolkit (MDT) to support Windows 10 on 17-Aug-2015. The latest version of MDOP and MDT is Microsoft Desktop Optimization Pack (MDOP) 2015 and Microsoft Deployment Toolkit (MDT) 2013 update 1. To download MDT 2013 update 1, please access the following web site.


To download Microsoft Desktop Optimization Pack (MDOP) 2015, make sure you have volume license account and then access the Volume Licensing Service Center to log in and download it.

For more information about the new release of these products. 
MDOP 2015:
Ready for Windows 10: MDOP 2015 and more tools are now available 

MDT 2013 Update 1:
MDT 2013 Update 1 Now Available
Ready for Windows 10: MDT 2013 Update 1 released

This posting is provided “AS IS” with no warranties, and confers no rights!

Monday, July 1, 2013

Installing and Configuring WDS and MDT 2012 Update 1 on Windows Server 2008 R2 Part 6

In part 5, I updated the task sequence and created the Windows PE images. In this part, I will upload the boot images to Windows Deployment Services and deploy Windows 7 to a workstation named WS01.

Configuring Windows Deployment Services
In part 1, MS01 was installed Windows Deployment Services but it wasn't configured. I will configure the Windows Deployment Services and upload the boot images into MS01.

1. On MS01, log in as Domain Administrator.
2. Launch "Windows Deployment Services".
3. Expand "Servers > MS01,MDTLAB.LOCAL".
4. Right-click "MS01,MDTLAB.LOCAL", select "Configure Server".


5. On "Before You Begin" window, click "Next".


6. On "Remote Installation Folder Location" window, next to "Path", enter "E:\RemoteInstall".


7. Click "Next".
8. On "PXE Server Initial Settings" window, select "Respond to all client computers (known and unknown)".


Remark: If you select "Respond only to known client computers", you need to create a computer object in Active Directory Users and Computers before deploying Windows to a workstation.

For more information:


9. Click "Next".
10. On "Operation Complete" window, clear "Add images to the server now" check box.


11. Click "Finish".
12. Right-click "Boot Images", select "Add Boot Image".


13. On "Image File" window, click "Browse".


14. Navigate to "E:\DeploymentShare\Boot" folder.


15. Select "LiteTouchPE_x86.wim", click "Open".


16. Click "Next".
17. On "Image Metadata" window, click "Next".


18. On "Summary" window, click "Next".


19. On "Task Progress" window, click "Finish".


Remark: We can add more than 1 boot image in the server.


Deploying Windows 7 image to a workstation
Now, the Windows Deployment Services is functioning. I will try to deploy Windows 7 image to a workstation, WS01. Because WS01 is a virtual machine in Hyper-V, I need to add a legacy network adapter in a VM.


1. Power on WS01.
2. Press 'F12" to start network boot.


Remark: If we imported more than 1 boot images in the Windows Deployment Services server, it provides a menu for us to choose which boot images.


We need to select the right version of boot images for deploying x86 or x64 Windows.

3. On "Microsoft Deployment Toolkit" window, click "Run the Deployment Wizard to install a new Operating System".


4. On "User Credentials" window, enter "User Name", "Password" and "Domain" to connect the network shares.


5. Click "OK".

Remark: For security reason, we should create a build account for MDT deployment in production environment.

6. On "Task Sequence" window, select "Windows 7 Enterprise x86 deployment".


7. Click "Next".
8. On "Computer Details" window, enter "Computer name" and "Domain to join".


9. Click "Next".
10. On "Move Data and Settings" window, click "Next".


11. On "User Data (Restore)" window, click "Next".


12. On "Local and Time" window, click "Next".


13. On "Ready" window, click "Begin".


The Windows deployment is being processed.


14. When Windows deployment finished, click "Finish".


Other parts
This posting is provided “AS IS” with no warranties, and confers no rights!

Sunday, June 30, 2013

Installing and Configuring WDS and MDT 2012 Update 1 on Windows Server 2008 R2 Part 5

In part 4, I created the driver profile and the task sequence. In this part, I will update the task sequence and create Windows PE images.

Updating the task sequence
I will update the "Inject driver" task and remove "Apply Local GPO Package" in the task sequence.

1. On MS01, log in as Domain Administrator.
2. Launch "Deployment Workbench".
3. Expand "Deployment Share > MDT Deployment Share > Task Sequences".
4. On central pane, right-click "Windows 7 Enterprise x86 deployment", select "Properties".


5. On "Windows 7 Enterprise x86 deployment Properties" window, select "Task Sequence".


6. Expand "Preinstall", select "Inject Drivers".
7. On right pane, next to "Choose a selection profile", select "Hyper-V 2012 x86 Drivers".


8. Expand "State Restore", select "Apply Local GPO Package".
9. Click "Remove".


10. Click "OK".

Remark: There are 4 GPO packs in "E:\DeploymentShare\Templates\GPOPacks" folder.


Creating a boot image
I need to create boot images for MDT deployment.

1. On MS01, log in as Domain Administrator.
2. Launch "Deployment Workbench".
3. Right-click "MDT Deployment Share", select "Properties".


4. Select "Monitoring" tab.
5. Check "Enable monitoring for this deployment share".


This is a new feature in MDT.

6. Select "Windows PE" tab.


We can change the file name of the boot image and the background image of Windows PE.

7. Select "Drivers and Patches".


We can select the profile for this boot image.


8. Select "Rules" tab.


Rules tab is used to modifying the customsettings.ini and Bootstrap.ini. These files are applied to control Windows PE environment for deployment.

For more information  about these files, please read the following web sites.


9. Click "OK".

Remark: After updating the Bootstrap.ini, you have to regenerate the boot images for updating the Bootstrap.ini.

10. Right-click "MDT Deployment Share", select "Update Deployment Share".


11. On "Options" of "Update Deployment Share Wizard" window, select "Completely regenerate the boot images".


12. Click "Next".
13. On "Summary" window, click "Next".


14. On "Confirmation" window, click "Finish".


15. Launch "Windows Explorer", navigate to "E:\DeploymentShare\Boot".


Boot images were created.

Other parts

This posting is provided “AS IS” with no warranties, and confers no rights!

Tuesday, June 25, 2013

Installing and Configuring WDS and MDT 2012 Update 1 on Windows Server 2008 R2 Part 4

In part 3, the operating system and drivers were imported into the Deployment Workbench. In this part, I will create a new driver profile and task sequence for deployment.

Creating a driver profile, it is for us to manage drivers and apply to difference scenarios. A driver profile can be applied to Windows PE and Windows to inject drivers. We can create multiple driver profiles for different hardware brand or different virtualization environments. 

Creating a driver profile
1. On MS01, log in as Domain Administrator.
2. Launch "Deployment Workbench"
3. Expand "Deployment Share > MDT Deployment Share > Out-of-Box Drivers".
4. Right-click "Out-of-Box Drivers", select "New Folder".


5. On "General Settings" of "New Folder" window, next to "Folder name", enter "Windows PE x86 Drivers".


6. Click "Next".
7. On "Summary" window, click "Next".


8. On "Confirmation" window, click "Finish".


9. Repeat step 4 - 8 to create a folder named "Hyper-V 2012 x86 Drivers".


10. On central pane, select all drivers.
11. Next to "Actions" pane, select "Cut".


12. Paste all drivers to "Hyper-V 2012 x86 Drivers" folder.


13. Navigate to "Deployment Share > MDT Deployment Share > Advanced Configuration > Selection Profiles".
14. Right-click "Selection Profiles", select "New Selection Profile".


15. On "General Settings" of "New Selection Profile Wizard" window, next to "Selection profile name", enter "Hyper-V 2012 x86 Drivers".


16. Click "Next".
17. On "Folders" window, check "Hyper-V 2012 x86 Drivers".


18. Click "Next".
19. On "Summary" window, click "Next".


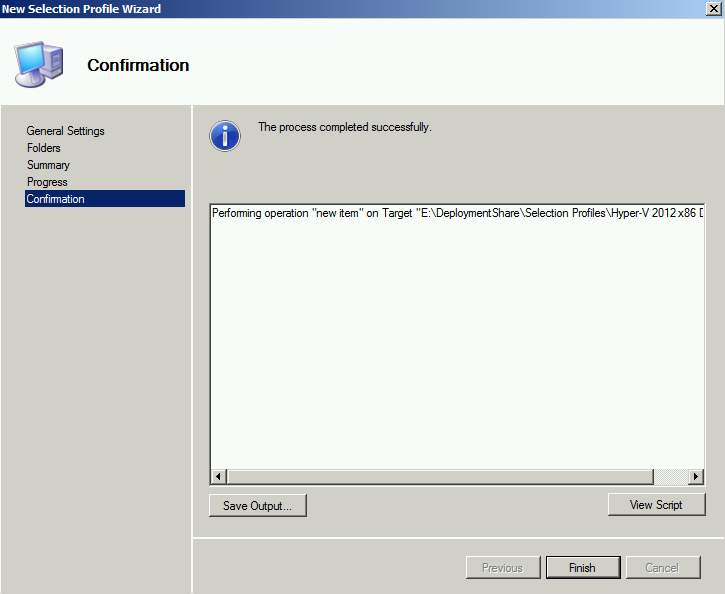
20. On "Confirmation" window, click "Finish".


21. Repeat step 14 - 20 to create a profile named "Windows PE x86 Drivers" which includes "Windows PE x86 Drivers" folder.


Creating Task Sequence
Task Sequence is applied to control the deployment of Windows. Windows will follow the task sequence to inject drivers, install applications , and so on.

1. On MS01, log in as Domain Administrator.
2. Launch "Deployment Workbench"
3. Expand "Deployment Share > MDT Deployment Share > Task Sequences".
4. Right-click "Task Sequences", select "New Task Sequence".


5. On "General Settings" of "New Task Sequence Wizard" window, next to "Task sequence ID", enter "001".
6. Next to "Task sequence name", enter "Windows 7 Enterprise x86 deployment".


7. Click "Next".
8. On "Select Template" window, select "Standard Client Task Sequence".


9. Click "Next".
10. On "Select OS" window, select "Windows 7 ENTERPRISE in Win 7 ent x86 install.wim".


11. Click "Next".
12. On "Select Product Key" window, select "Do not specify a product key at this time".


13. Click "Next".
14. On "OS Settings" window, enter "Windows User" under "Full Name" and "Organization".


15. Click "Next".
16. On "Admin Password" window, select "Do not specify an Administrator password at this time".


17. Click "Next".
18. On "Summary" window, click "Next".


19. On "Confirmation" window, click "Finish".


As a result, the task sequence, 001, was created for deployment.

This posting is provided “AS IS” with no warranties, and confers no rights!