As previous lab, Managing and configuring Windows iSCSI SAN in System Center Virtual Machine Manager 2012 R2, I added the Windows iSCSI SAN in VMM 2012 R2. After that I created a logical unit and then assigned it to a Hyper-V host.
Now, I'd like to add a Windows File Server in VMM 2012 R2 and then assign it to a Hyper-V host.
The file share to store virtual hard disks in a File Server should support SMB 3.0.
Goal
- Discovering a Windows File Server in System Center Virtual Machine Manager 2012 R2
- Creating a file share through System Center Virtual Machine Manager 2012 R2
- Assigning the file share to a Hyper-V host
Prerequisites
- The domain environment has been set up. If you would like to know how to set up a domain, please read Dcpromo on Windows Server 2012
- System Center Virtual Machine Manager 2012 R2 has been installed in a server which is named VMM01. For the detail steps, please read Installing System Center Virtual Machine Manager 2012 R2 in Windows Server 2012 R2
- Adding "SCVMM Admins" into a local administrators group of SS04.test.tls1.lab
Lab environment
The accounts and server names of this lab environment are based on Installing System Center Virtual Machine Manager 2012 R2 in Windows Server 2012 R2 and Managing and configuring Windows iSCSI SAN in System Center Virtual Machine Manager 2012 R2.
I will add a new Windows Server 2012 R2 named SS04 in the existing lab environment.
Computer Name: DC01.test.tls1.lab
Server Roles: Domain Controller and DNS Server
Operating System: Windows Server 2012 R2
Computer Name: VMM1.test.tls1.lab
Server Roles: VMM management server
Operating System: Windows Server 2012 R2
Computer Name: HV02.test.tls1.lab
Server Roles: Hyper-V host
Operating System: Windows Server 2012 R2
Computer Name: SS04.test.tls1.lab
Server Roles: a member server with only 1 drive letter C
Operating System: Windows Server 2012 R2
Lab
Adding a Windows File Server in VMM console
1. On VMM01, log in as VMMAdmin.
2. Launch "Virtual Machine Manager Console".
3. Log in with "Use current Microsoft Windows session identity" option.
4. On "Virtual Machine Manager Console", select "Fabric".
5. On "Fabric" pane, select "Storage".
6. On the menu, click "Add Resources > Storage Devices".
7. On "Select Provider Type" dialog box, select "Windows-based file server".
8. Click "Next".
9. On "Specify Discovery Scope" dialog box, next to "Provider IP address or FQDN", enter "SS04.test.tls1.lab".
10. Next to "Run As account", click "Browse" and then select "VMMAdmin".
11. Click "Next".
12. On "Gather Information" dialog box, click "Next".
13. On "Select Storage Devices" dialog box, click "Next".
14. On "Summary" dialog box, click "Finish".
Creating a file share through VMM console
1. Still in VMM console, on the menu, click "Create File Share".
2. On "Create a file share" dialog box, next to "File server", select "SS04.test.tls1.lab".
3. Next to "Name", enter "DataStore Share 01".
4. Next to "Classification", select "Bronze Tier".
5. Next to "Local path", enter "C:\DataStoreShare01".
6. Click "Create".
Remark: Administrators also can perform PowerShell cmdlets to create a file share.
7. Click "File Servers".
The file share was created successfully.
Assigning the file share to HV02
1. Still in VMM console, select "Servers > All Hosts".
2. Select "hv02", make sure under "Host" tab, click "Properties".
3. On "hv02.test.tls1.lab Properties" dialog box, select "Storage" tab.
4. Click "Add > Add File Share".
5. Next to "File share path", select "\\SS04.test.tls1.lab\DataStore Share 01".
6. Click "OK".
7. Select "hv02", make sure under "Host" tab, click "Properties".
8. On "hv02.test.tls1.lab Properties" dialog box, select "Storage" tab.
As a result, the file share was assigned to HV02.
Test result
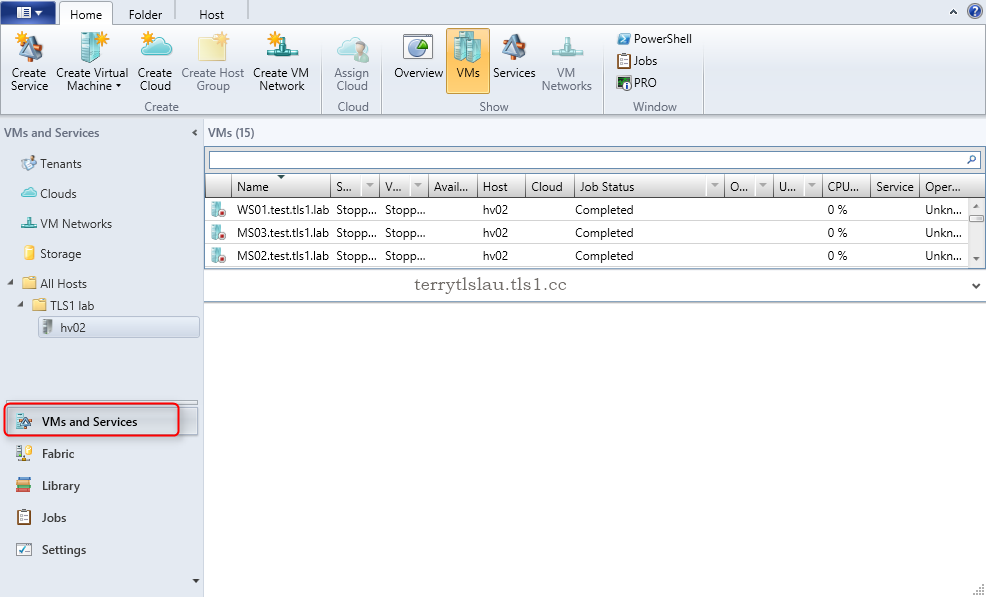
1. Still in VMM console, select "VMs and Services".
2. On the menu, click "Create Virtual Machine".
3. On "Select Source" dialog box, select "Create the new virtual machine with a blank virtual hard disk".
4. Click "Next".
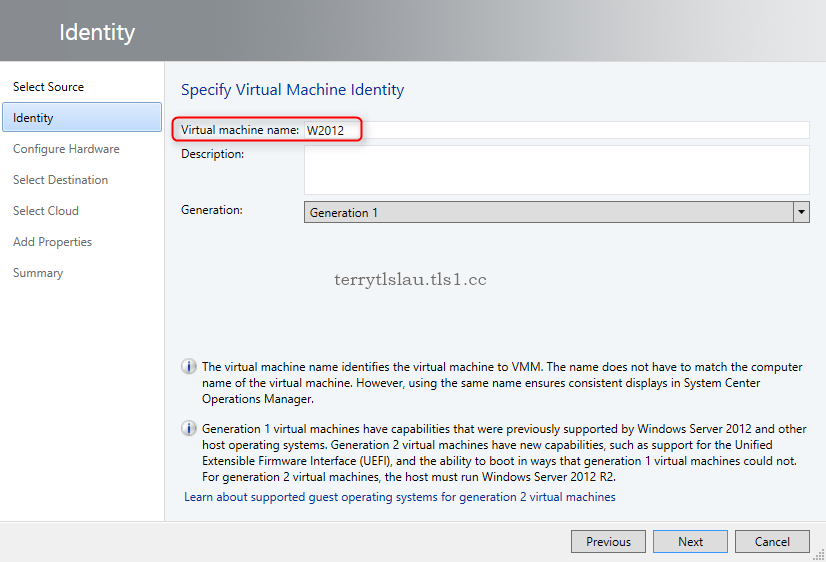
5. On "Identity" dialog box, next to "Virtual machine name", enter "W2012".
6. Click "Next".
7. On "Configure Hardware" dialog box, click "Next".
8. On "Select Destination" dialog box, leave default settings, click "Next".
9. On "Select Host" dialog box, click "Next".
10. On "Configure Settings" dialog box, make sure "Locations" path and "Machine Resources" path are under the file share.
11. Click "Next".
12. On "Select Networks" dialog box, click "Next".
13. On "Add Properties" dialog box, leave default settings, click "Next".
14. On "Summary" window, click "Create".
As a result, the virtual machine configuration file and virtual hard disk are saved in the file share.
More information:
This posting is provided “AS IS” with no warranties, and confers no rights!


Hello This works Fine but only when creating a VM , What if I want to add a SCSI disk VHD from the File Share. when I try to add a scsi Disk it never gives me the option of where to place the VHD. it just automatically uses the CSV. Do you know how to get around this. I looked every where on the internet and everyone describes how to add a Disk at time of creating the VM.
ReplyDeleteany hel would be greatly appreciated thanks
Hi,
DeleteBase on my understanding, administrators need to create a new VHD first. After that, select the virtual hard disk and then click "Browse" to select a new path for the VHD.